Friday, August 13, 2010

The Charm of Chimes


Digging through boxes in the attic, 
I discovered a set of tarnished flatware.
I believe they were my father-in-laws.
Looking at the discolored pieces, I knew there was no
 chance I would ever take on the task of cleaning them.  


Chimes from flatware are nothing new.
Still, they are a charming adornment for an outdoor space
and quick to assemble.
Less than one hour from start to finish. 


I think these held syrup

Many things around the house will work:
cookie cutters, kitchen utensils, keys, small glass bottles.
You can find all of these items at the thrift store. 

For drilling into metal you will need a power tool
and a small cobalt drill bit.
After drilling a hole all the way through the handle,
file off the burrs before stringing with fishing line.
Pull line through drilled hole, double knot and again
after securing to the mesh basket,  
fashioning various lengths for each utensil

It is easier to start from the middle and work outwards.
Make sure there's at least 1" of space
between each secured item.
Afterwards, apply a dab of cement glue to all the knots for a permanent fix.


15 pieces of silverware and glass bottles made this too heavy
to hang with fishing line, so I purchased 4ft of black chain
at the hardware store (sold by the foot). 
4 equal chain lengths, 1 for the middle, and 3 evenly spaced
around the top perimeter of the basket creates balance.
An old drapery ring joins the 4 lengths of chain for hanging.


I had all items on hand, except the black chain.
Total cost, $4.49.

They chime beautifully.

Thursday, July 22, 2010

The Crab Nebula


smoky haze reminds me of swirling gases in outerspace

Last summer, I painted the tv/game room a pumpkin orange.

album frames are from Restoration Hardware


A couple of space themed movie posters and framed album covers 
helped turn the once bland walls into a cozy, modern, fun room
with a hint of retro appeal.

However, I was drawing blanks when it came to decorating
the large wall space behind the pool table.
Adding more album covers or movie posters seemed excessive. 

The bar mirrors that used to hang on the wall 
no longer suited the ‘family’ décor.


I had purchased a poker table for my husband over the holidays.
The table top was protected in the carton by
(2) 48"x48" x1/8" mdf boards.

They took up a lot of space but I'm glad I saved them.

After months of debating, a recent viewing of the Crab Nebula
set in motion an idea for the vacant wallspace.


One of the boards would make an ideal canvas
for my "interpretation" of the Crab Nebula and
a perfect compliment to the movie posters.


I lightly sanded the sheen with 100 grit sandpaper,
cleaned, and followed this up with 5 coats of gesso.
I also applied gesso to the back as well.

The size of this board would be expensive to frame
and the thinness (1/8") would make it display more like a poster. 

Not the impact I was going for.


My solution was to attach a hidden frame
made from square wood stakes
that would allow the board to set out from the wall,
creating a shadow effect.
  
The frame is reinforced with L-brackets
making the mdf very sturdy but not too heavy.

Picture sits out approx. 2" from the wall.

The rough cleat also provides a convenient way to hang on the wall.


I created the effects by applying acylic paint 
with rags, cellophane, feathers, and sponges.


The vibrant colors and scale of this painting did not stand out
until I added stars using qtips.

Amazing how that little detail, really transformed the picture.

Total cost, < $20. 
That pleases me the most. 

Monday, March 22, 2010

My Favorite Kitchen Gadget

The Bread Machine!
For me, in terms of convenience, it rivals the crockpot.

Ma machine de pain, decorated with the kids magnetic gears, 
symbolize this kitchen work horse.

Focacia:  The Ultimate Bread Machine Book

We love the smell and taste of fresh baked bread.
The aroma permeates the house and gradually
brings everyone into the kitchen. 

Lavash: The Ultimate Bread Machine Book

My Welbilt bread machine has earned a permanent place
on the kitchen counter. I use it that often.

I mastered most of the basic bread recipes that came
with my first Welbilt bread machine, 15 years ago.
When it shot craps, I immediately got another
Welbilt bread machine.


Looking to expand my bread making knowledge
I purchased The Ultimate Bread Machine Book,
by Jeannie Shapter.
This book showcases 150 recipes, including popular breads
from many countries, full-color photographs,
step by step techniques and tips.


The book's recipes use the bread machine's dough feature
(for mixing and rising the dough),
then shaping the loaves by hand and baking them in the oven,
demonstrating that most any bread machine will work.

Focacia (ready to bake)

Using fresh ingredients, will produce the best results.

Lavash (ready to bake)

Two of my family’s favorites are Focacia and Lavash,
rustic flat breads that use basic ingredients
and are quick and easy to prepare using the dough setting.

Focacia with red peppers
Baked Lavash topped with poppy seeds, sesame seeds, and fresh parmesan cheese.

This bread is delicious as a snack,
and with soups and salads.

Thursday, February 25, 2010

Rocker Chick Elegance

I’m back…..and revving up with this easy, easy diy.
I purchased this necklace at the thrift store for $3.

The gray beads and chain are gunmetal and in excellent condition.
However, I needed to replace the pink bubble gum beads
before I would wear this out in public. 

gunmetal jump rings and headpins, olive jade and quartz crystal beads

After some deliberation, my choices
came down to olive jade, faceted cones and
40 mm rough cut, faceted quartz crystals that I've had in my stash
forever.

I chose the quartz crystal as the
beads took up more space creating an even chunkier look.

My local craft store did not carry gunmetal findings
so I had to purchase the headpins and jump rings on line.

I made a connector and attached a jump ring for each crystal (4),
 and attached to the chain.
(jewelry making basics)

Because of the extra weight of the quartz crystals,
I replaced only 4 of the 7 pink beads.
 
The center metal bead hung longer 
so I adjusted the link to be the same as the other metal beads.

As for those left over pink beads,

maybe I'll assemble a  molecular geometry mobile for my boys.
Just kiddin'!

Thursday, January 28, 2010

I am still here in spirit.

Work is crazy for me the first two months of the year.
 I barely have time to read others blogs. I realize now,
I should have offered up an explanation sooner as to my lack of posts.

My load will lighten up considerably
around the week of Feb. 22nd, at which time, I look forward to
getting back into the swing of things with weekly diys.

I hope that the new year finds everyone happy, healthy and harmonious.

I offer a glimpse into diy 2010.


quartz crystals + gunmetal necklace (a thrifty purchase)
= a quality piece


Breadmaking 101


Inspiration


and the interpretation


vintage restored


Dumas' work reinvented


Thursday, December 24, 2009

Thursday, December 10, 2009

The boots were hung by the chimney with care

Update:  Some of the pics were not loading correctly.

Look no further than your closet for inspiration
to create these whimsical boots err…stockings.


Throughout the year, I acquire deeply discounted
upholstery remnants and ribbon/trims at the fabric store,
or find drapes in rich brocades at the thrift store
for less than $5.oo a panel.

These are not traditional holiday fabrics, deliberate on my part.


Iron on applique trim.

Thinking out of the box....anything goes.
Using embelishments already on hand enhances creativity.


Rhinestone strand removed from old t-shirt.

I think these stocking boots are festive.
They make great gifts.


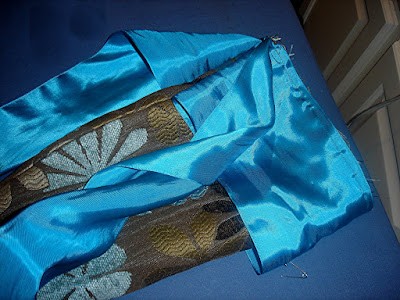
I make the pattern out of a grocery sack or newspaper
and tracing about ½” out and around the entire boot.
The pattern is also used to make the lining.


Better to pin, but I used soup cans as weights instead. !Laaazzy!

Cut out 2 boots and sew up the bottom and sides
I use the end of a small paint brush and


gently push out the toe and heal of the boot.
Press seams.


Pin trim to the boot and sew.  The seam will later be hidden.
I used a silk ribbon, leaving the tails long to tie a big fancy bow.


Cut out the lining.
Notice: The lining is cut so it stops at the ankle of the boot.
*You’ll see why.

Sew up the lining leaving about a 5” opening along the back seam.
Do not turn out!


Place the boot inside the lining and sew along the top opening.
Press the seams of the lining and push down into the boot.

*Take some batting and push it down into the foot of the boot
through the opening in the lining,
giving a nice full shape to the boot.
There is plenty of space for the goodies.
This boot will hold a bottle of wine!

Pull the lining back out and sew up the 5" opening.


The hook is actually part of a hoop earring.


I’ve attached the hook and tied the bow. 
I'm done!

HA!


The old earrings occupy my thoughts a lot lately.


Now I'm done.


Jester Stocking (on either end) made with Dawn Anderson, Vogue Pattern 7375.

LinkWithin

Blog Widget by LinkWithin