Showing posts with label paint. Show all posts

Thursday, July 22, 2010

The Crab Nebula


smoky haze reminds me of swirling gases in outerspace

Last summer, I painted the tv/game room a pumpkin orange.

album frames are from Restoration Hardware


A couple of space themed movie posters and framed album covers 
helped turn the once bland walls into a cozy, modern, fun room
with a hint of retro appeal.

However, I was drawing blanks when it came to decorating
the large wall space behind the pool table.
Adding more album covers or movie posters seemed excessive. 

The bar mirrors that used to hang on the wall 
no longer suited the ‘family’ décor.


I had purchased a poker table for my husband over the holidays.
The table top was protected in the carton by
(2) 48"x48" x1/8" mdf boards.

They took up a lot of space but I'm glad I saved them.

After months of debating, a recent viewing of the Crab Nebula
set in motion an idea for the vacant wallspace.


One of the boards would make an ideal canvas
for my "interpretation" of the Crab Nebula and
a perfect compliment to the movie posters.


I lightly sanded the sheen with 100 grit sandpaper,
cleaned, and followed this up with 5 coats of gesso.
I also applied gesso to the back as well.

The size of this board would be expensive to frame
and the thinness (1/8") would make it display more like a poster. 

Not the impact I was going for.


My solution was to attach a hidden frame
made from square wood stakes
that would allow the board to set out from the wall,
creating a shadow effect.
  
The frame is reinforced with L-brackets
making the mdf very sturdy but not too heavy.

Picture sits out approx. 2" from the wall.

The rough cleat also provides a convenient way to hang on the wall.


I created the effects by applying acylic paint 
with rags, cellophane, feathers, and sponges.


The vibrant colors and scale of this painting did not stand out
until I added stars using qtips.

Amazing how that little detail, really transformed the picture.

Total cost, < $20. 
That pleases me the most. 

Thursday, October 29, 2009

EYE SEE YOU !

Spooky, mysterious, bulging, or innocent,
eyes are a spectacular feature to enhance at Halloween.


If you’re sporting an extra one, you’re sure to get some attention.

Be forewarned: Friends will demand that you make one for them too.
 I made 8 of these t-shirts last year.


Black button still affixed a year later.

Mine has faded quite a bit.  I now wear it to the gym.

Time to make another more dramatic eyeball t-shirt!


A (cheap) t-shirt . Launder first if it is new.


Eyeball image. Look online, at the library…
T-shirt transfer paper for lazer or ink jet printer.
Follow enclosed instructions carefully.


Determining where I want my image before ironing.

This turned out fantastic and would be perfect to wear as is,
but I’m not one to leave well enough alone.

Fabric Paints
Fabric/Jewelry glue
A large button
Sequins (didn’t use this time)


I am not practiced with the fabric paint applicator tip,
so I pour out what I need, sometimes mixing colors, and use a brush.
I have much more control this way.


A large 1 1/4" faceted black button, like a compound eye!  Yes!

Remove the shank with wire cutters and sand smooth.
Apply jewelry glue and affix to the center of the shirt.


It really adds the finishing touch!

Monday, October 12, 2009

PB: Inspiration for DIY


Mauve/decopauged thrift store table, $15. Stripped, refinished, and added new hardware
to resemble a PB table for use as a nightstand in my son's room.  

Whether its repurposing furniture,


Beaded fringe added to Asian lamp shade for a Victorain flair. 

spiffing up existing items with clever accents,


Son's junk art guitar, made from a Gateway box, wood trim remnants, and acrylic paints.
PB Teens for inspiration.  It really is acoustic. 


Wood composite trim;   Primed, painted, distressed,
added (10) drawer pulls, and hung the trim 5 feet from the floor
in the laundry room to hold totes, raincoats, backpacks...


Odd sized frame, garage sale find,  $.50.
Barbed wire from the 1800's.
Wood shelving from great, grandfathers barn.
This assembly nearly came together on its own
at which time my husband claimed for his office wall.

or creating distinctive displays, using color, texture, and imagination,

PB is a source for ideas and inspirations, when I'm 'drawing' blanks.

My son wanted Euro pillows similar to some we had seen in PB Teen.
I borrowed a friends PB Euro Pillow Case and took measurements.


They look complicated but in fact are very easy to make.


The finished pillow measures 30x30 with a 2” flange
 for a 26x26 Euro Pillow.

Before cutting, launder/iron your fabric.

Use a ruler or straight edge and draw the panels right on the fabric.

Make the length (for the back pieces) with the grain and
be sure to mark the grain direction for the front panel.


Cut 1 panel 31” x31” for the front (ex.a)
For the back you need  2 pieces that create an over flap
to insert your pillow form.
Cut (1) 17”x31” (ex. b) and (1) 21” x 31” (ex. c.)


For the 2 back panels, fold and press the middle seams ½”,
then fold over 1”, press, stitch close to the inner edge.

Hint: for visible stitching, increase stitch length to 3.5mm for a professional look.

Assemble pillow in this order.

Front panel (ex. a) print side up
17x31 (ex. b) print side down and lined up to one side
21 x 31 (ex. c) print side dorn and lined up to other side

Make sure the fabric grain is in the same direction as back pieces.


Pin sides and stitch all the way around the pillow using a 1/2" or 5/8 seam allowance".
Trim seams to 1/4". Press open seams.
Turn pillow right side out pushing out corners, press.

Stitch around the pillow 2” from edge to create the flange.


Hint: Put a piece of masking tape on your sewing machine,
measure 2” to the right of needle, draw a straight line with ruler.
Use as a guide, lining up the outer edge of the fabric as you sew.


Insert pillow form


My son  loves them….


so I made some for my other son.


He loves them too!

Monday, August 17, 2009

DIY Water Fountain

A fun, creative, and green, diy summer project that is easy on the budget
but has a big decorating impact is to make a water fountain.


Click on images for closeups.


Since we recently remodeled our outdoor living area,
I'm focused on adding 'comforting' details with visual appeal.


I considered purchasing a fountain for a corner space
after noticing the nearby outlet.
Unfortunately, the only fountains
I liked were $300.-$400.

I have a knack for sniffing out the priciest items.

A thrifty compromise.

My diy fountain was assembled with items we already had,
including the pump, stored away after the demise
of my husband’s salamander, Newt.


Imperfections add charm.

I had purchased this warped, plaster stand at
the thrift store last year for $3,
painted it, and was using as a plant stand, till now.

What you will need for this diy;
Submersible water pump.
You can get a pump at any home and garden center
for around $20. You will need to purchase 1/4" or 1/2" plastic tubing,
cut to length after you decide how the water will flow.


Container to hold water and deep enough to submerge your pump.
This one is approx. 4” deep.


An assortment of rocks, shells, marbles, etc… for the water to cascade down.


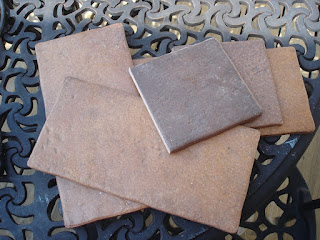
Tile remnants from a kitchen remodel.


Use rocks, tile, anything that will add height and volume.


Save your decorative pieces for the top.

Fill spaces with smaller objects like sea glass, marbles, shells...

Place your container on a stand or small table.


After it was all put together,
it didn't quite soothe me.
The base and container were a perfect unit but the colors clashed.
So I painted both pieces to resemble aged metal.

I often do things in reverse.

Sometimes this backwards thinking produces fantastic results!


Add water.


It works! Now that's harmony!

Wednesday, August 5, 2009

Paint Y'er Jeans

Most of my jeans are stained with paint or hole ridden.

Not by design.

I paint regularly in them and have earned every rip, tear, and stain. Remarkably, people come up to me and ask where I got my jeans.

A candid experiment.

When working on a project, I wear my paint jeans several times
before laundering.
Therein lies the success of this diy.

Be prepared: It's a drawn out process but worth the effect.
Click on images to see what I mean.

These jeans were on clearance for $20.

I see a future project with these scraps.

Going for a cropped look, I used a straight edge and a razor,

and removed 8” off the length.

A razor gives a better effect than scissors!

Next, I washed and dried the jeans. Do this if they are new.
Using a ruler, I striated various colors with a palette knife into the denim.
The trick to using acrylic paint on jeans is

to apply the paint thinly…don’t glob it on or the paint will crack.


Dry thoroughly after each paint application.
Do not put in the dryer!
Sand lightly with 120 grit, use a shop vac or brush off dust.
Repeat until the desired effect is achieved.
Do not wash the jeans for a week after painting them,
which will allow the acrylic to set up in the denim.


They will fade a little with each washing.
This can be minimized by washing in cold water,
inside out, and drying on low heat, or air drying.
I used a bit of metallic paint on mine.
Unfortunately, the sheen is gone after the 2nd washing
However, the acrylic is permanent.
Try it, you'll like it.

LinkWithin

Blog Widget by LinkWithin